Setting up your office floor plan in Reservete takes about 10 minutes: create your workspace and building, upload your floor plan image, place desk markers with drag-and-drop, assign space types, and enable live availability dots. Then invite your team - desks are bookable immediately.
Sign up (or log in), create your workspace, and name your building and floors. Multi-building setups just repeat the flow per building - each floor gets its own plan image.
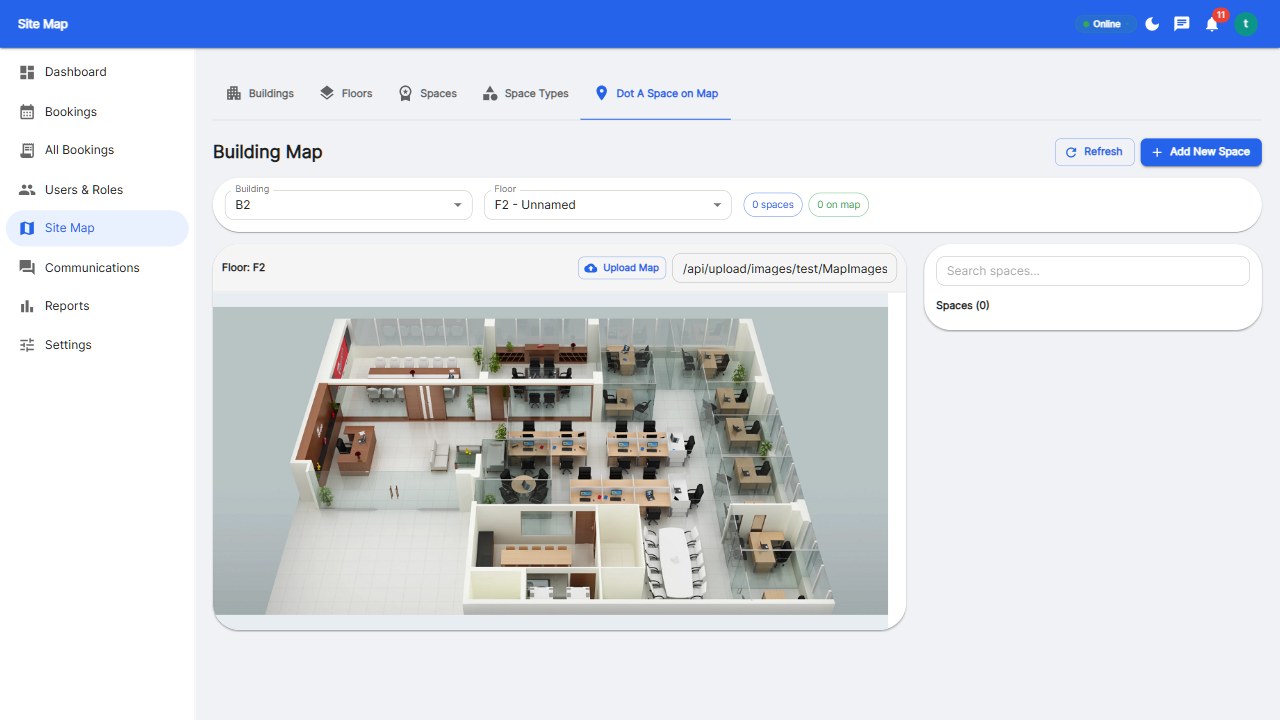
Upload a floor plan image (a screenshot of your CAD file or a phone photo of the office diagram works). The plan becomes your booking map - no redrawing required.
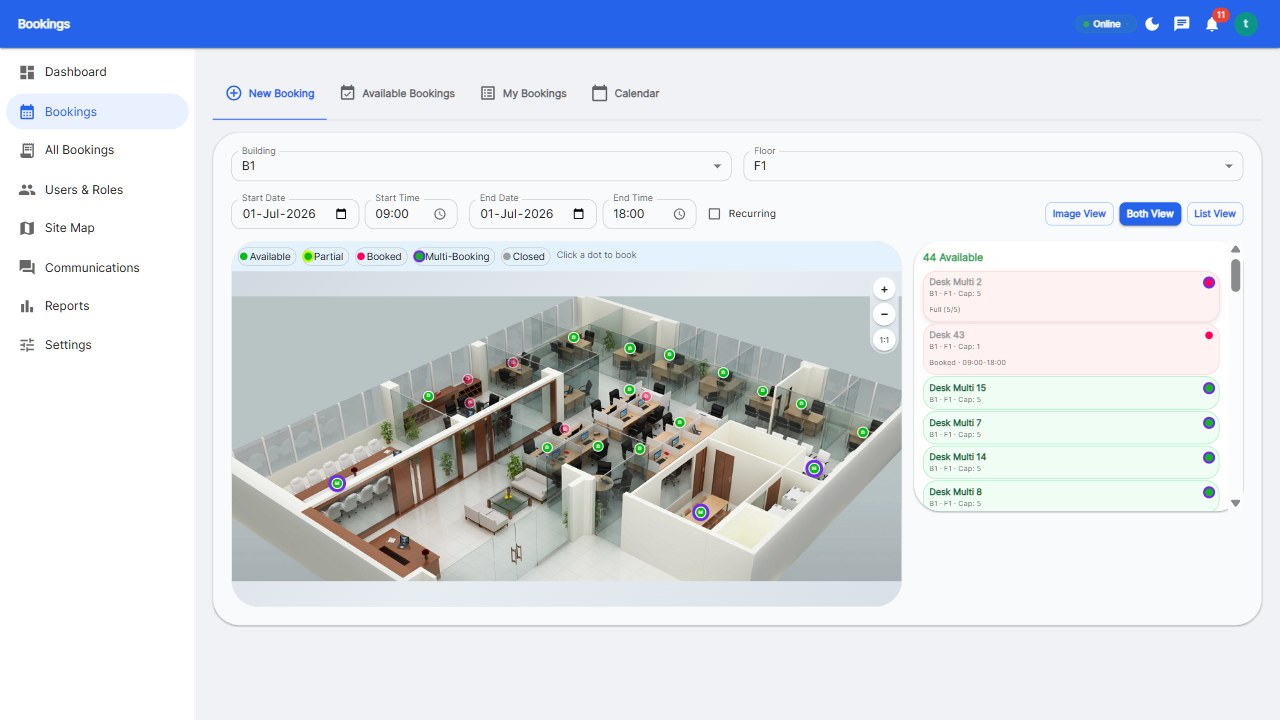
Drag-and-drop markers onto each desk location. Give each a name (B3-14 style), assign a space type (desk, room, parking), and set the marker letter shown on the map. Live availability dots (green/amber/red) appear automatically.
Define space types with booking rules: desks (open booking), rooms (approval for premium), parking (windows aligned to desks). Set check-in windows, grace periods, and no-show expiry once - they apply everywhere.
Invite employees by email (or enable SSO so the directory syncs). They open the app, see the live map, and book. Setup time: under an hour for most offices, with the floor plan itself taking about 10 minutes.
About 10 minutes for the floor plan itself: upload image, place markers, assign types. Full workspace setup is under an hour including team invites.
No - any floor plan image works: CAD export, diagram screenshot, or photo. Markers are placed with drag-and-drop on the image.
Yes - create multiple buildings and floors, each with its own plan. Employees switch buildings in one tap.
Go from signup to bookable desks in 10 minutes.
Start your free 30-day trial at Reservete.com - no credit card required, full access to every feature.

Enterprise workspace management platform. Book desks, meeting rooms, and parking spots in seconds.
Get product updates and workspace tips.